
Band Portal guide
Set up your band page
Choose what fans see on your page and in what order, then fill in each section: the biography, links, photos, members and more.
Your first visit
Open your band from My bands. Its workspace has the tabs Page, Posts, Music, Events, History, Team and Stats. This page covers Page and History.
The first time you open a band, you may be asked to accept the Band Content License. It lets The Band Index show your band's logo, bio, links and posts. Tick the box and press Accept and continue. You do this once per band, and again only if the license changes.
If the page hasn't been set up yet, you'll see Your band page isn't set up yet. Press Create the page. It starts from the standard layout, with the FAQs suggested for your band already picked. You can change everything after.
Two ways things save
This is the one thing on the Page tab that's easy to get wrong.
- These wait until you press Save page: the order of the sections, whether each one is Shown or Hidden, the Large banner, the FAQ, and the switches under Shown in this section in Band info. While they wait, a bar at the bottom says Unsaved changes, with Discard and Save page.
- Changes you make inside a section's Settings go live right away, on their own: the biography, links, band info, Spotify, timeline, photos, members, and releases you hide. A new logo goes live as soon as you publish it.

Your logo
Your logo shows on your band page and wherever your band appears on The Band Index.
- Press Upload a logo and choose a file: PNG, JPEG or WebP, 200 to 5000 px on each side, up to 5 MB.
- Check the previews under Publish this logo?. They show how it looks on your band page and in lists.
- Press Publish logo. It replaces your logo everywhere on The Band Index right away.
Choose your sections and their order
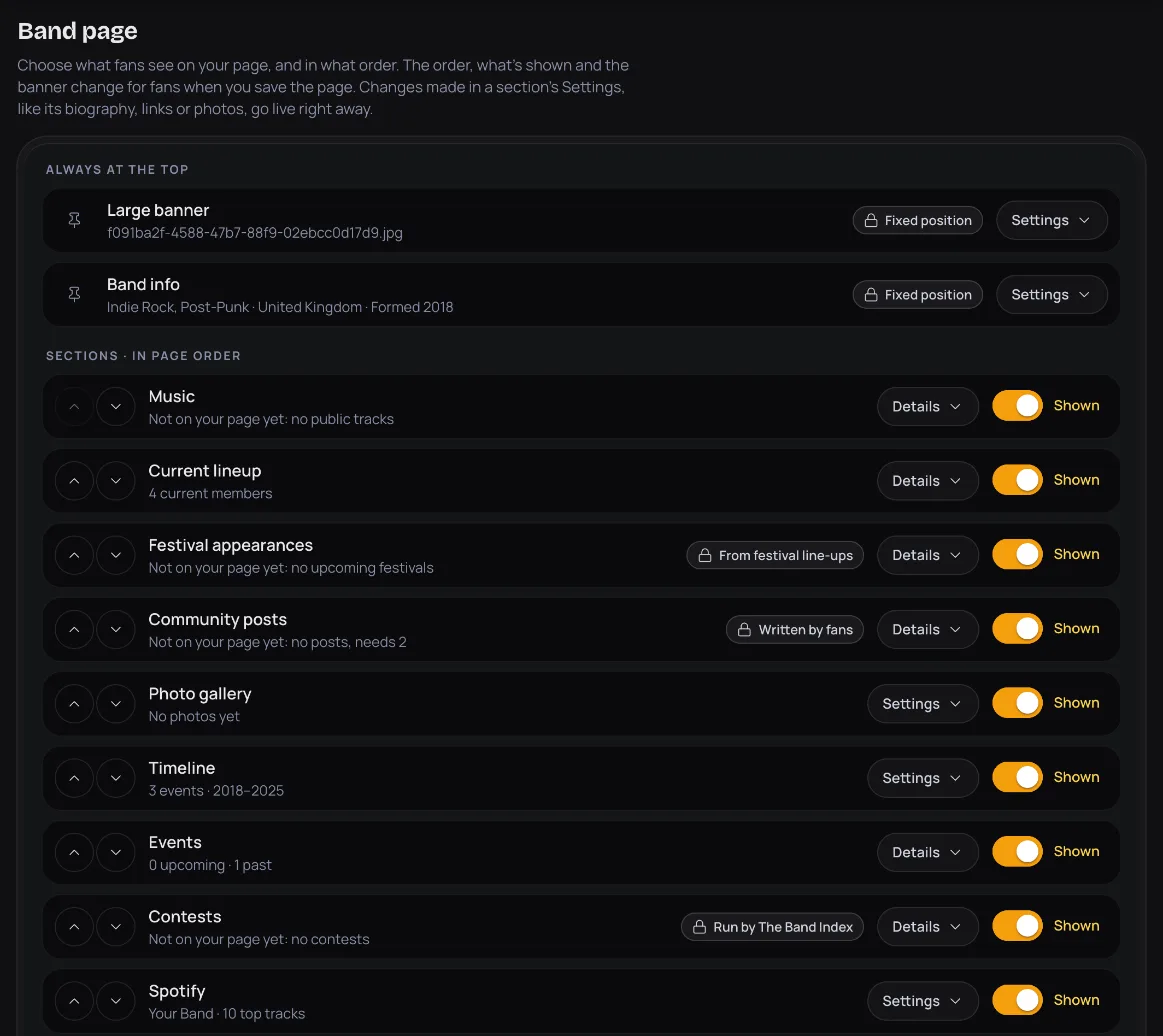
The Page tab lists your page's sections in the order fans see them. Large banner and Band info are always at the top. The rest are under Sections · in page order.
- Use the up and down arrows on a row to move a section.
- Use the switch on the right of a row to set it to Shown or Hidden.
- Press Settings on a row to see what you can change in that section. Sections filled from somewhere else show Details instead.
- When you're happy with the order and what's shown, press Save page. You'll see Page saved.
Each section's Settings
Open a section's Settings from its row. Each part below says whether it goes live on its own or waits for Save page.
Large banner
Waits for Save page.
Choose a Banner image: JPG, PNG, WebP or GIF, up to 10 MB. Fill in Describe the image, which is read aloud to people who use screen readers. Width (px) and Height (px) are optional: 0 means the default, 1280 × 600.
Band info
Goes live on its own.
Set the Country, the year the band Formed and its Genres, then press Save band info. It's live on your page right away.
The Band name is locked, because renaming moves your page address, so our team does it. Press Ask for a change to email us. Once the country is set, it can't be cleared. A genre missing from the list? Email support@thebandindex.com.
The switches under Shown in this section choose whether the genres and location show in this section. They wait for Save page.
If another manager saved the band info while you were editing, you choose Use theirs or Keep mine.
Biography
Goes live on its own.
Write up to 3,000 characters, in English: fans who use other languages see a translation. Leave an empty line between paragraphs. You can use **bold**, *italic* and [link text](https://…).
Press Preview to see it the way fans will, then press Save biography.
If our AI wrote the biography you have now, the portal says so. Rewrite it in your own words: once you save, it's yours, and our AI won't change it.
External links
Goes live on its own.
- Press Add a link.
- Paste the address into Link. Links to sites we know show their icon.
- If you like, give it a Name, and tick Our official website for your own site.
- Press Add link.
You can reorder, edit or delete your links. Up to 30 show on your page.
Links we brought in from music databases sit under Not shown on your page. Fans don't see them.
Spotify
Goes live on its own.
Under Find your artist on Spotify, type your band's name or paste its open.spotify.com/artist link, then press Use this artist. Later you can press Change artist or Remove. Once you remove it, we won't link a Spotify artist on our own again.
If your Spotify artist is linked to another band, email support@thebandindex.com.
Timeline
Goes live on its own.
Press Add an event. Fill in the Year, which can be one year or a range like 1986–1988 or 1999–present, and What happened, up to 100 characters. Add Details if you like, up to 1,000 characters.
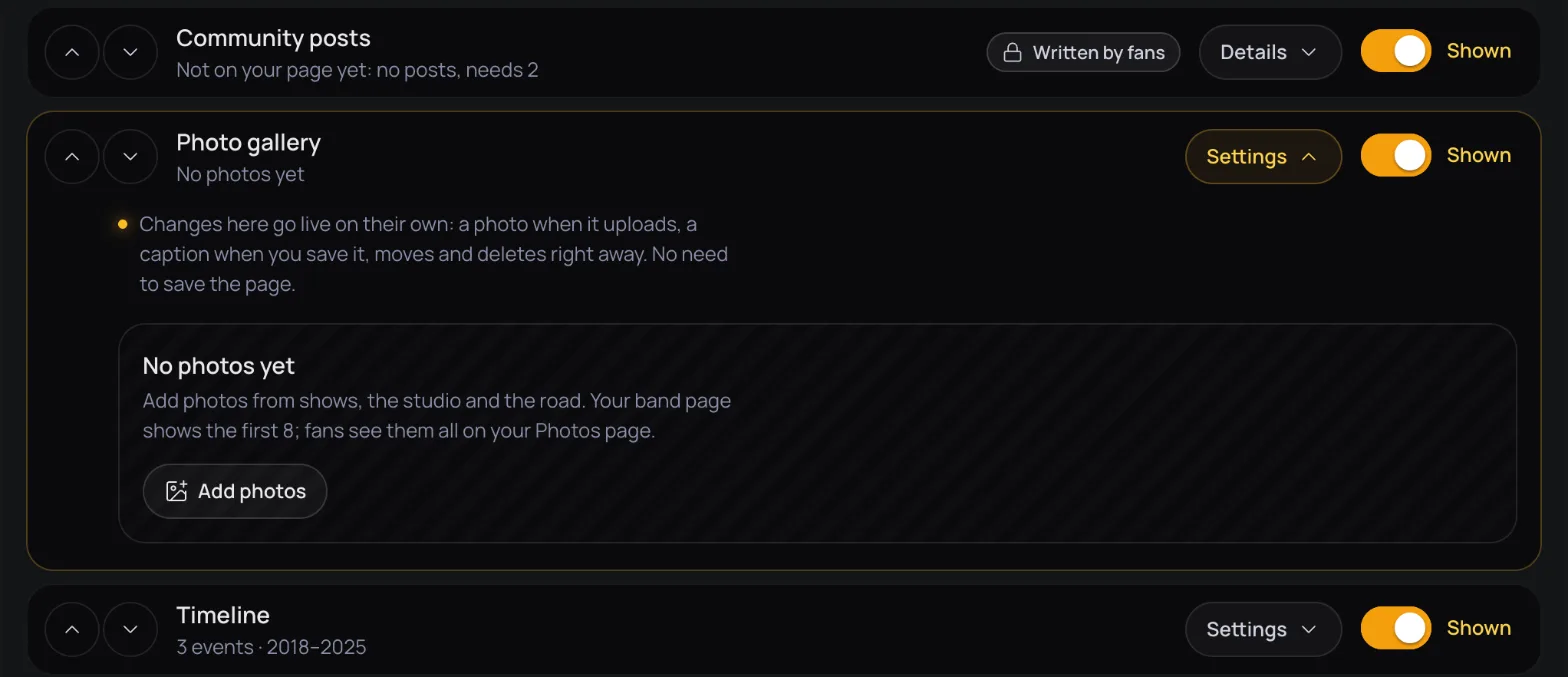
Photo gallery
Goes live on its own.
- Press Add photos and pick up to 10 at a time: JPG, PNG or WebP, up to 10 MB each, at least 200 px on each side.
- Tick the box to confirm it's your photo, or that you have the photographer's permission.
- Add a Caption and Photo by if you like, then upload.
The first 8 photos show On your band page. The rest are Only on your Photos page. Use Move to top or reorder them to choose your 8. You can keep up to 100.
Photos go up with no review. You can also delete photos that fans added or that we brought in.
Members
Goes live on its own.
- Press Add a member and fill in the Name.
- Add Roles: pick one from the list, or type a new one and press Enter.
- Under Time in the band, tick Founding member or Former member if they apply, and fill in Year joined and Year left. For someone who left and came back, press Add another period.
- Add a Short bio if you like, then press Add member.
When someone leaves the band, edit them and tick Former member instead of deleting them. Members are grouped as Current and Former, and the Current lineup section on your page comes from this list.
FAQ
Waits for Save page.
Under Common questions, tick the ones to show. Suggested marks the picks for your band. Under Your own questions, press Add a question to write your own.
Discography
Goes live on its own.
Your releases come from MusicBrainz. Press Hide on a release that isn't yours. It comes off your page right away, and you can undo it from the message that pops up.
Releases you hid are listed under Hidden from your page, where Show brings one back. To bring back one under Hidden by our team, email support@thebandindex.com.
With 12 or more releases, use Find a release to search them.
Sections filled from elsewhere
These sections fill themselves, so their row shows Details instead of Settings. You only choose where they sit and whether they're shown.
- Music: your tracks from the Music tab.
- Events: shows from the Events tab, Ticketmaster and festival line-ups.
- Current lineup: the current members from Members.
- Community posts: written by fans. It shows once there are at least 2.
- Festival appearances: from festival line-ups. To fix one, email support@thebandindex.com.
- Contests and Collections: run by The Band Index.
Bring back an earlier layout
Each time the page is saved, the layout it replaced is kept on the History tab, up to the last 20. Restoring one keeps your current layout too, so nothing is lost.
- Open the History tab. The top item, What fans see now, is your page as it is.
- Find the version you want. Each one says when it was live and who saved the page.
- Press Restore, then confirm.
See your page as fans do
Press View public page at the top of your band's workspace. Your page on thebandindex.com opens in a new tab, as fans see it.
All guide pages
Ready to start?
Find your band and send a claim, or add it if it isn't on The Band Index yet. It's free.